Configure the track plan in the Yard Editor
-
Create the track plan in a rectangular shape using the track plan tool  . With this tool, you draw each line of the rectangle by clicking each successive corner point starting from the top left corner and going in a clockwise direction. Double-click the fourth point to close the rectangle. For instructions, see the Track Plan form (on page 1).
If you plan to use the geospatial features in N4 for mapping railcars to adjacent rail transfer points, your track plan should be defined with relative spots (a relative track plan), and not fixed spots. For relative spots, check the Spots Relative box. If you leave this box unselected, you will be creating a fixed track plan, and the subsequent Rail Track form (on page 1) will require you to provide a value for the Spot Length field. See Types of track plans for more information.
The top left corner of the track plan must be a 90 degree angle. N4 calculations about the track offsets are dependent on the angle being 90 degrees.
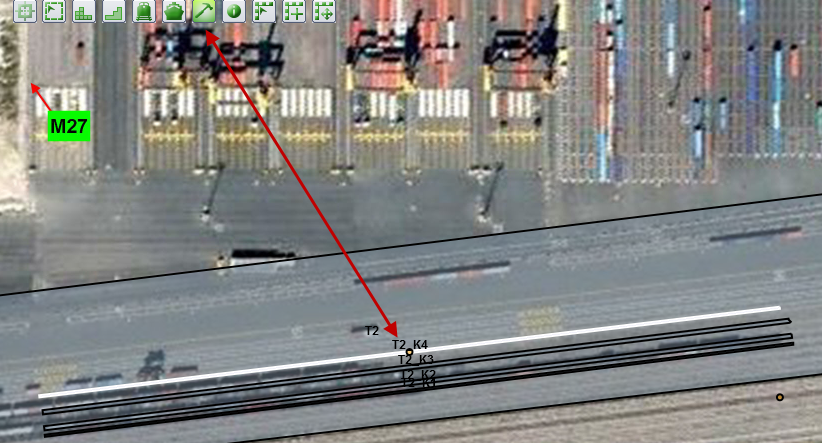
To check dimensions and location relative to key reference points in the yard, use the Yard Path tool  to draw a line and double-click the termination point. When the Add Yard Path form appears, read the Distance field from the Add Yard Path form. You can cancel out of that form without saving the line (path).
-
Create prestage groups for rail using the Prestage Group form (on page 1).
You use the Prestage Group form to determine the prestage locations, or yard blocks, that will comprise the group. A prestage group consists of prestage areas that are defined separately as regular yard blocks and then assigned to tracks. N4 supports a maximum of 20 prestage locations per prestage group.
To add or edit a prestage group:
-
In the Name field, enter a string of up to three characters.
-
Click Save.
-
The Prestage Locations tab (on page 1) becomes available.
-
Click  to add prestage locations using the Prestage Location form (on page 1) or double-click an existing prestage location to edit it. Note: N4 allows you to include stack blocks in prestage groups.
Always make sure to delete any old or unused blocks and prestage locations. When you delete a prestage location, N4 also deletes the transfer zone associations for the prestage location's stack block.
-
Click Close.
-
Verify whether the prestage blocks and track plan are configured correctly. For instructions, see the Validate Yard Model form (on page 1) in the Yard Editor help.
-
Create transfer zone associations between the rail prestage locations and the track plan by clicking the Yard Path tool and drawing a line from the vertex of prestage block to the vertex of the track plan. See the Transfer Zone Association form (on page 1) in the Yard Editor help for more information. Also, as stated above, if you forget to create the transfer zone associations using the Transfer Zone Association form, N4 does this automatically before it generates the XPS yard file (yard.nyd) as long as you have added them to a rail prestage group in the Track Plan form. If N4 does this automatically, the default Associated Location is Block End = 'Low', and Row or Column = 'Row'.
If centroids do not appear in the blocks, it means there are errors with your yard model. Use the Validate Yard Model form (on page 1) on the main Yard Editor menu to find out what needs to be fixed.
-
Add the prestage locations that you created in step 1 to the track plan under the relevant prestage groups using the Prestage Group form (on page 1) ().
-
Use the the Modify Block tool  to select and then drag your prestage locations into the boundaries of the track plan. Adjust the block so that the bottom left corner is located accurately with respect to the reference point. Check the distances of key points using the Yard Path tool .
In the Yard Editor view, the track plan is like a film that overlays any prestage blocks within it. If you need to adjust the position or modify something about a prestage block that is already positioned within the boundaries of the track plan, you can use the Stack Block tool  to click anywhere onto the yard plan and then from the menu that appears asking you whether you want to create a new block or modify an existing block, choose Existing. N4 the provides you with a list of the existing blocks. From the list, select the existing block you want to modify. It appears in the position where you clicked with the Stack Block tool tip. From there, you can right click to modify the block, or use the Modify Block tool to reposition it within the track plan.
Make sure that prestage locations fall within the scope of the track plan polygon and within the boundaries of the rail tracks. If not, they won't display properly.
-
Create rail tracks using the Rail Track form (on page 1):
-
Zoom in on the track plan. You will be drawing the track as a long, narrow rectangle within the track plan.
-
With either no tool or the Modify Block tool selected, right click within the track plan, and from the menu that appears, select Add Rail Track.
-
Carefully click once at the location of the track plan origin (top left corner). This sets the track origin point.
If you are placing existing tracks, you can just double click the origin point and select Existing from the dialog. The Place Rail Track form (on page 1) appears. Skip to the last step.
Be sure to draw the track polygon from left to right. If you draw from right to left, N4 is not able to spot railcars.
-
Drag the mouse to the right, and click once at the location where the track ends inside the track plan. This sets the top right track border.
-
Drag the mouse 90 degrees from the top right track border the width of the track, and click once to set the bottom right track border.
-
Drag the mouse left, in vector that is 90 degrees from the bottom right track border, and click a point directly below the track origin point.
-
Drag the mouse back up to the track origin point, and double-click. This completes the track dimensions, and launches a dialog that asks you whether you are placing new or existing tracks.
-
If you are placing a new track, the Rail Track form appears.
-
If you are placing an existing track, the Place Rail Track form appears.
Below are some points to consider.
-
Draw the tracks parallel to the top line of the track plan.
-
Ensure that the top left corner of the track is located accurately with respect to key reference points in the yard. (You can check these reference distances with the Yard Path tool as noted above.)
-
For fixed track plans, which required leaving the 'Spots Relative' check box unselected in the Track Plan form, the Rail Track and Place Rail Track forms have a Display tab. On that tab, you are required to provide a value (in meters) for the Spot Length. The other fields on that tab are also important for fixed track plans. For relative track plans, which required selecting the Spots Relative box in the Track Plan form (on page 1), the Display tab in the Rail Track form is not available. N4 automatically calculates those values for relative track plans. See Types of track plans in the XPS Rail Planning and Control manual for more information.
-
Provide an accurate Meter Mark Offset value. This value is important for the geospatial location features in N4. See Meter Mark in the XPS Rail Planning and Control manual for more information.
If you need to adjust where the track is located, use the Modify Block tool to select and then drag your track to the correct location. Note that tracks must be moved by clicking on the track's vertex. You can move the track up, down, and sideways, but you cannot rotate the track on its vertex.
If needed, you can later:
 Change a rail track's width and spot length. For details, see Regen. Rail Track from (on page 1).
Move or reshape rail elements. For details, see Modify shape or position of yard elements (on page 1).